How High-Precision Scanners "Feel" for Tiny Flaws
2025-12-25 16:48How High-Precision Scanners "Feel" for Tiny Flaws
The Art of Digital Touch
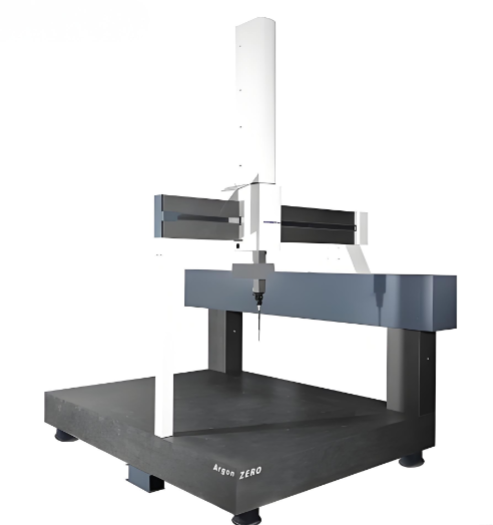
When we think of quality control, we often imagine a sharp-eyed inspector scrutinizing a product. However, in the world of advanced manufacturing, the most critical flaws are invisible to the naked eye. This is where high-precision scanners come into play, acting as a form of "digital touch" that goes far beyond human capabilities. Unlike a simple camera that captures surface appearances, these sophisticated systems, such as Coordinate Measuring Machines (CMMs) and advanced 3D scanners, work by capturing millions of data points from an object's surface. They don't just "see" the object; they construct a hyper-accurate digital twin, a perfect three-dimensional replica. This process is akin to creating a detailed topographic map, where every contour, curve, and dimension is recorded with micron-level accuracy. This digital twin becomes the ultimate reference, allowing engineers to detect deviations that are finer than a human hair, ensuring that every part meets its exact design intent before it ever reaches the assembly line.

Sensing and Algorithms in Harmony
The ability to "feel" for flaws hinges on the seamless integration of two core technologies: advanced sensing and intelligent algorithms. High-resolution sensors, whether optical, laser, or touch-trigger probes, act as the scanner's nerve endings, meticulously capturing the physical geometry of a component. For instance, a vision measuring system uses high-resolution cameras and complex lighting to capture 2D and 3D dimensions, while a contour projector might use optical illusions to magnify a part's profile for precise measurement. However, raw data is meaningless without interpretation. This is where powerful software algorithms take over. They compare the captured data points of the physical object against the perfect CAD model it was designed from. The software doesn't just identify a difference; it analyzes it—calculating the flatness of a surface, the roundness of a bore, or the precise roughness of a texture. This synergy between hardware and software is what transforms a simple scan into a profound insight, enabling manufacturers to not only find flaws but also understand their cause and prevent them in the future.

From Aerospace to Everyday Electronics
The applications of this technology are as diverse as they are critical. In the aerospace industry, a single microscopic crack in a turbine blade can lead to catastrophic failure. High-precision scanners are used to ensure these components are flawless, verifying complex geometries and surface integrity to guarantee the safety of thousands of flights. In the automotive sector, scanners ensure that engine blocks, transmission parts, and, crucially, sensor assemblies for new energy vehicles (NEVs) are manufactured to exact specifications, optimizing performance and longevity. Even the sleek, seamless design of your smartphone or laptop relies on this technology. The scanner ensures that the casing fits perfectly, the buttons have the right tactile response, and the internal components are aligned with microscopic precision. By catching flaws early in the production process, these scanners prevent costly recalls, reduce waste, and uphold the reputation of brands that depend on impeccable quality, proving that this "digital touch" is a fundamental pillar of modern, reliable manufacturing.

